Beats Solo 3 Wireless Headphones on Amazon
Here is how I fixed the Beats Solo 3 Wireless headphones to fix the problem with audio not working on one side when connected with bluetooth. In my particular case the right ear cup (the one with the micro-USB connector) was not producing any sound.
Beats Solo 3 Wireless headphones wiring diagram:

To fix the problem I did the following:
1. Open up the left ear cup carefully
2. Take pictures of where each cable is connected to and make notes
3. Removed the headphone jack and circuit board
4. Cut all the wires from the circuit board
5. Connect all the negative, ground, and DET wires all together by soldering them together
6. Connect the Bluetooth Left and Right positive wires to the corresponding positive leads of the left and right headphone speakers by soldering them together
7. Carefully put the left ear cup back the way it was
Recommended Headphones
| Image | Headphone Model | Review Video | Driver Type | Earcup Type | Price ($) |
|---|---|---|---|---|---|
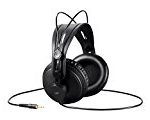 | Monoprice Modern Retro | Review Video | Dynamic | Closed-Back | $ |
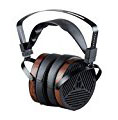 | Monoprice Monolith M1060 | Review Video | Planar Magnetic | Open-Back | $$ |
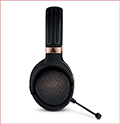 | Audeze Mobius Gaming Headset | Review Video | Planar Magnetic | Closed-Back | $$ |
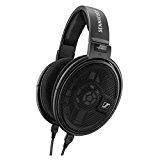 | Sennheiser HD660S | Review Video | Dynamic | Open-Back | $$ |
 | Audeze LCD-XC | Review Video | Planar Magnetic | Closed-Back | $$$ |
Are you a Student? Did you know that you can get a free Prime Student 6-month Trial! After the 6-month free trial you can enjoy Amazon Prime for 50% discount with your student benefit. Get unlimited free 2-day shipping on textbooks, tech, and tons of other stuff.